Dynamic wetness in Unreal
Article explaining how I made a responsive screen-space wetness
What is this all about?
This project is part of my third-year coursework at university and began as a concept for a graphics feature in a game, but it was halted at the conceptual stage.
The idea was to simulate rain effects by making surfaces wet precisely at the point of each raindrop’s impact during runtime.
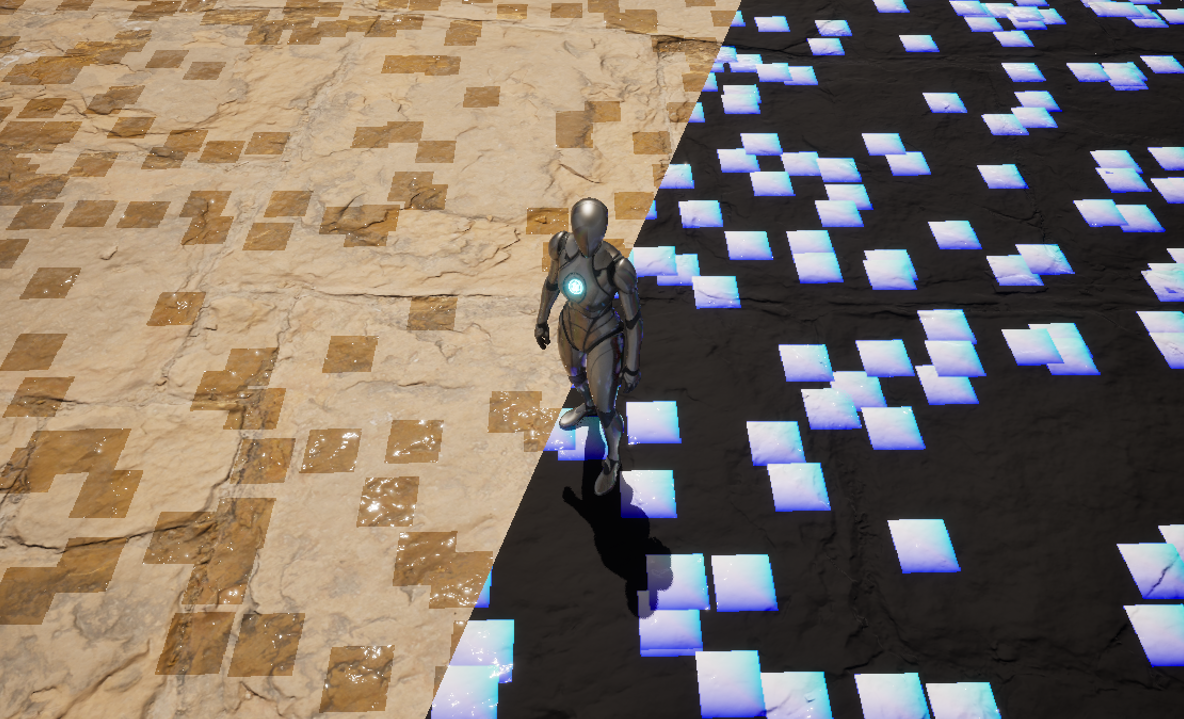
I created a demo featuring dynamic rain particles, a material function for wet effects, and a screen-space wetness mask to define wet spots on the screen. This involved deep research into Unreal’s Niagara system, materials, and rendering pipeline.
Check out the link to the GitHub.
In this article, I will explain the details of this effect:
Key algorithm steps
Creating a screen mask
All the wet spots from rain drops are rendered into a single full-screen texture as instanced primitives (in my particular case the primitive is a plane).Applying wetness mask
When material shader contributes to the pixel, it takes into account the wetness value from a screen mask, so that the surface can get a wetness value.
Niagara particles
The particles in the project are slightly modified ones from the Ghislain Girardot’s tutorial. Particles have complex and physicly accurate behavior that includes 3 different states:
Sticky
The particle (a rain drop) sticks to the surface. It will follow the gravity and try to fall down, however, depending on the velocity and particle mass it will either stay sticky and follow the surface, or come off the and fall down.Fall
A free fall state.Splash
When the particle fas falling and reached the surface, it switches to a splash state. This state visualized the splash, then killing the particle.
When the particle enters this state it contributes to the screen mask.
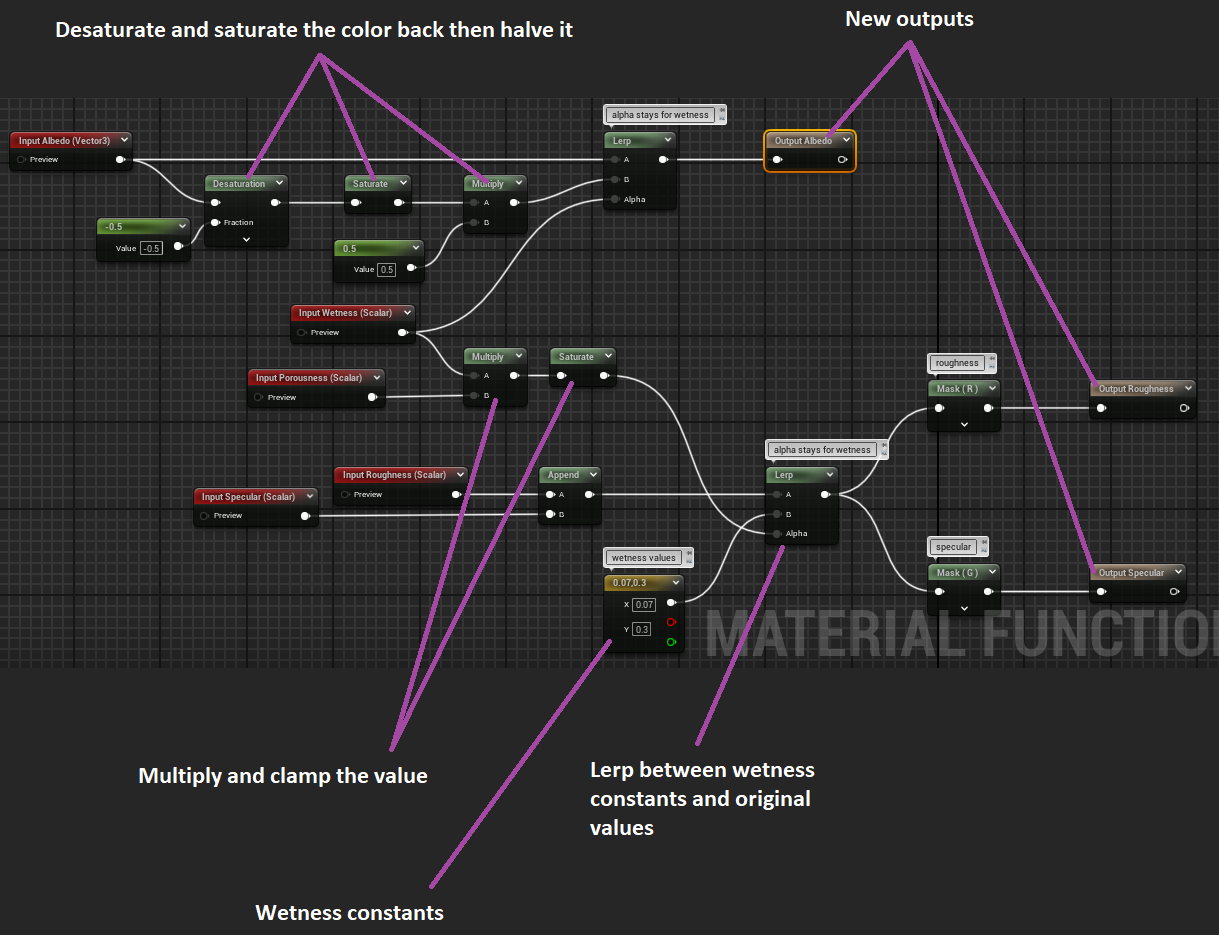
Material function
A universal material function, that can make any material look wet by tweaking wetness values. The function in the project is based on Ben Cloward’s tutorial.
Real life observations
Through observation, I noted how materials react differently to water:
- Absorbent Materials (e.g., towel, carpet, paper, stone):
Water darkens the base color, making the surface look soaked. - Non-Absorbent Materials (e.g., glass, metal, plastic):
Water accumulates on the surface, increasing the specular highlights.
Node graph explanation
Conclusion
It was all about learning how to use Niagara, materials, and researching rendering pipeline in Unreal. I am more then happy with the result, especially being able to make some a cool graphics feature in Unreal, an engine already known for its outstanding graphical capabilities.
You are free to use this code in your project.
How to use is explained in theREADME.mdfile of the repo.
Thanks for reading this article. GG
![]() The project has been undertaken as a university assignment.
The project has been undertaken as a university assignment.